Showing posts with label recipes. Show all posts

Sunday, November 6, 2011

Jalapeno Pepper Jelly

 A friend had bushel baskets full of peppers that they had picked before a freeze and offered some to me.  I was excited because I have been wanting to try to make Jalapeno Pepper Jelly for a very long time.
 
I used this recipe from allrecipes.com:  Hot Pepper Jelly 
I didn't measure each type of pepper exactly, but made sure that I had 4 cups of peppers total and that worked fine.  I just used what I had.
  
I learned a couple of lessons:
  • The recipe is perfect.  A lot of the reviews suggested doubling the pectin.  Don't do it.  If you bring the jelly up to a rolling boil (which is a boil that can't be stirred down) it will gel.  We panicked and added more pectin because it didn't seem thick enough.  It will set up more with time.  My jelly is now too gelled.  (Does that even make sense????)
  • Many cooking experts tell you to wear gloves when cutting hot peppers.  I didn't do it.  Very bad idea. Please wear gloves.  OUCHIE! 
  • If you don't wear gloves, be of good cheer.  Your hands will eventually quite burning after HOURS of pain. 
  • This is a fantastic way to eat your vegetables, but the scale is telling me that it does need to be eaten in moderation.  Dumb scale. 
    We used FlipSiders crackers.  The ones with pretzel on one side and a buttery cracker on the other. And we had cream cheese, because I ♥ cream cheese☺
Is it snack time yet?

Thursday, November 3, 2011

Fall Cravings

I have been craving pumpkin. So far I have made at least 4 pumpkin pies and pumpkin waffles. Yesterday, I was in the mood for pumpkin but didn't have a whole lotta time to come up with dessert. So I tried Natalie's recipe for Pumpkin Crunch. Oh mercy.
Natalie recommends ice cream AND cool whip. I only had ice cream. I also was out of pecans. Boo. But we managed to choke down the whole pan anyway :)
Quick, Easy, and Yummy. What more could you ask for?

Tuesday, May 24, 2011

It's Strawberry Picking Time

We went to a local u-pick strawberry patch, Jester Creek Farm, on Monday to go treasure hunting for red, juicy yumminess. My brother and sister-in-law own the patch and this is the first year that they are in business.


Once we brought the strawberries home, we had to decide what to do with them. I was hoping to make jam, but the kiddos had other ideas. . .

and their ideas were pretty yummy too.

I tried a new recipe and it was amazing.
You can find the recipe here
It was truly the best strawberry pie I have ever had.

Oh, and you should check out what Beki is doing with strawberries: S'mores with strawberries??? Oh yes please. Those ginormous "campfire" marshmallows jumped into my cart while grocery shopping so I'm all set for that fantastic idea.

Tuesday, October 5, 2010

Coffee Cake

All summer long I avoid baking anything more than I have to. Our house, the kitchen especially, gets so hot in the summer that baking doesn't even sound fun.

But now that our house has a crisp fall breeze floating through it and we wake up with chilly noses, baking quickly becomes one of the things I enjoy the most.

This morning we ate this coffee cake still warm from the oven. Oh my. . . it was good. And the best part is that I put it together the night before. This morning, I quickly threw back the covers, raced barefooted across the chilly floors to put the coffee cake into the oven, and then raced back to bed for more snuggles with the little ones. Got up 35 minutes later to an amazing spicy fall-like smell in the house.

Perfect!

Get Your Craft On Tuesday

Thursday, August 12, 2010

Crispy Peach Cobbler

My parents went on a short trip to an auction and discovered a fruit stand along the way selling peaches. My mom called to see if I wanted any.

Be still my heart. . .

Peaches are one of my most favorite summer fruits. Okay, I love strawberries and cherries too, but peaches made into a crisp, buttery, peach cobbler is perfection and so easy to make.

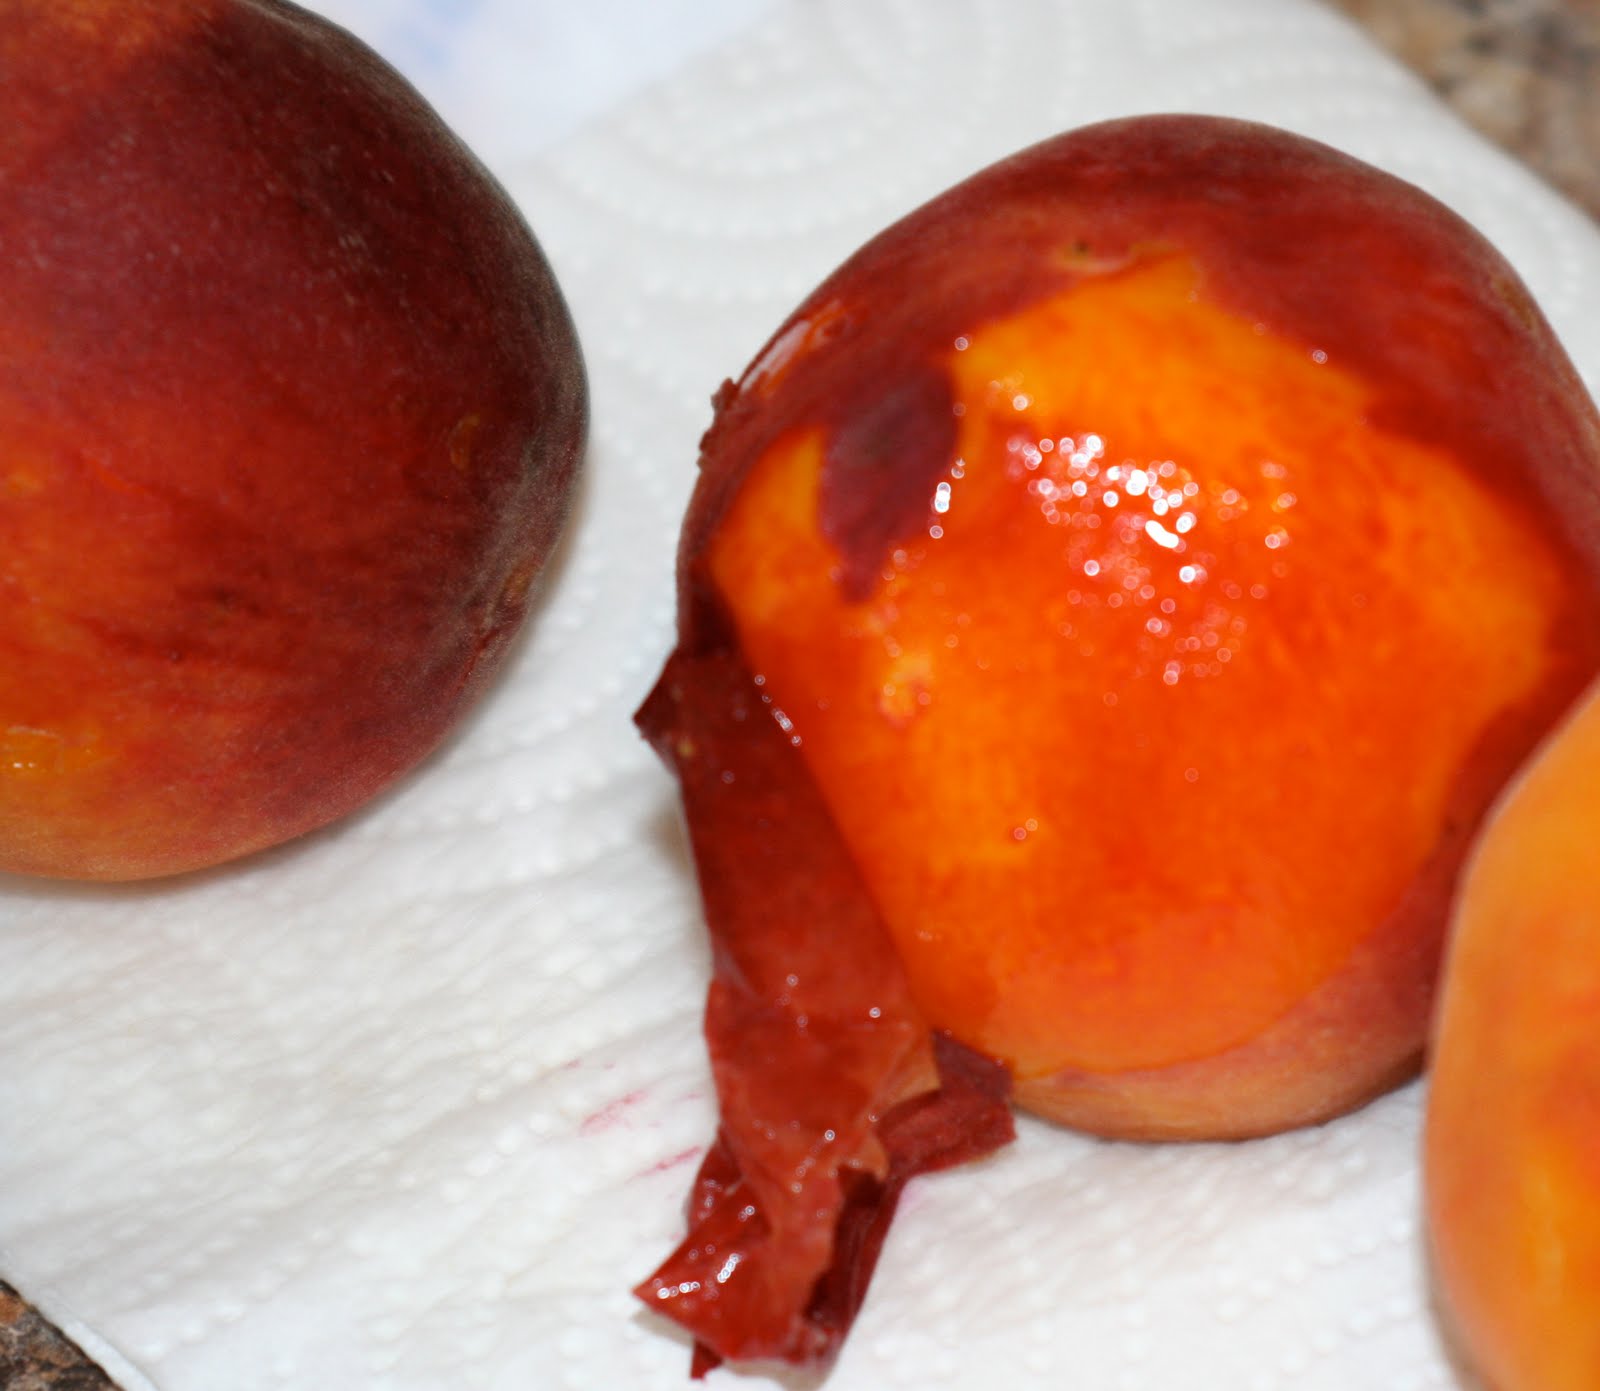
To peel a peach, I drop a ripe peach into boiling water for about a minute.

Then you can put the peaches into cool water until you are able to handle them and they should peel easier.

To make peach cobbler, slice 4 cups of peaches.

Put a stick of butter into a 9x 13 " pan and pop it into your warm oven until melted. My kitchen was so hot that I just let the pan with the butter sit on the counter and it melted just fine. It has been so crazy hot around here.

Yes, I said a WHOLE stick of butter. When we are talking about a good peach cobbler, it is not time to count calories. ☺ Trust me.

Place the four cups of sliced peaches right on top of all of the melty, buttery, yumminess and then pour your batter made from 1 cup flour, 1 cup sugar, 2 teaspoons baking powder, 1/8 teaspoon salt, and 3/4 cup milk right over the top of the peaches.

Bake for about 40 minutes or until golden brown and bubbly.

Serve warm with a lot of homemade vanilla ice cream.

It really is best served the day you make it, so we went ahead and ate the whole thing.
I think I could have eaten more if there had been any left. The crispy, buttery edges and corners are the absolute best.

Just looking at the empty pan makes me kind of sad. I might need to make more.

Crispy Peach Cobbler
1/2 c. butter (1 stick) melted
1 c. flour
1 c. sugar
2 tsp. baking powder
1/8 tsp. salt
3/4 c. milk
4 cups fresh or frozen peaches (could try other fruits)

Place butter in the bottom of a 9x 13 " pan. In bowl, mix together flour, sugar, baking powder, and salt. Stir in milk and blend until smooth. Place fruit over melted butter in pan, and drizzle batter over the top. Bake at 375° for 40 minutes or until brown and bubbly. Serve warm with ice cream.☺


Wednesday, June 30, 2010

I never saw a Purple Cow. . .

A. likes to cook and experiment in the kitchen so I gave him an easy recipe for a Purple Cow and let him go to it. It was a great cool snack on a hot summer day and very kid-friendly.

I was on hand to make sure that the lid on the blender was on right. It almost wasn't~Can you imagine the mess that would have made??? It makes me shiver just to think about it.

PURPLE COW

1 6 oz. can of frozen grape juice concentrate
1 cup milk
1 tsp. vanilla
ice cubes (10-12)

Throw it all in the blender and blend it up until smooth. Drink it right away.

Please try to share with your siblings if you can. ☺

Wednesday, June 2, 2010

Homemade Yogurt and other random stuff

On Monday, my husband was home for Memorial Day. It was so nice to have him home. After almost a year of being unemployed and being able to work at home before that, he now has two part-time jobs. We are very thankful for the employment, but I sure miss having him home.

May 31 is also our anniversary. We have been married 13 years. I'm so thankful that God gave a man to me that I still love after 13 years. We've been through a lot, especially this last year, and we have only grown closer and more in love as a result. I'm truly blessed with a great man.

Lately I've been on a homemade yogurt kick. It is so easy and yummy plus tons cheaper than buying yogurt for 6 people. I had forgotten how easy it was so I hadn't made yogurt for a really long time. The weather in Kansas has been so hot and humid lately having a cold smoothie for breakfast sounded perfect to me. I make yogurt a half gallon at a time. The recipe I have been using can be found here. If you need a smaller recipe, you can find it here. I haven't tried this one, but it looks like it is similar to the one I used.

Measure out 2 quarts (8 cups) of milk. Heat the milk to almost boiling. Then allow the milk to cool to 120º.

Once the milk has cooled to 120º, whisk in a 1/2 c. of yogurt culture. That sounds really fancy, but it's just plain yogurt that has "active cultures". I'm pretty sure almost any plain yogurt you buy at the store would qualify and work fine. After you have made yogurt, you can save a half cup of your own homemade yogurt to work as a starter for the next time you make it.

After whisking in the yogurt, I pour it back into my huge measuring bowl that I measured the milk in, and cover with plastic wrap. Then I put it into my oven with only the light bulb on until it is set. You could also insulate it with towels like the recipe suggests. I think my mom used to put it on top of an electric heating pad. My kitchen has been really hot lately so it doesn't take 4 hours for me (which is what the recipe recommends) so check it occasionally. When it is set, pop it into the refrigerator to chill.

This morning, I took a couple of over-ripe bananas, frozen blueberries, lemon juice, a couple packets of stevia, my homemade yogurt, and a cupful of ice cubes and blended it up for a smoothie. Delish. You can use whatever combination of fruit and juice that you happen to have and that sound good to you. I had hoped we would have some leftovers to freeze into Popsicles, but we didn't.

I might have to make more.

Thursday, May 6, 2010

Pretty please with cherries in the middle. . .and maybe some ice cream on top?

Cherry Crisp is one of my all-time favorite desserts. The key for me is to thicken cherries myself rather than using cherry pie filling. If you want to use purchased cherry pie filling because time is short, it will work fine but it won't taste quite as good.

Okay so maybe that's just me being a little snobby. . .
But maybe we can just call me opinionated about cherries instead??? That sounds a lot better than snobby.

Cherry Filling:


For the cherry filling you need two cans of tart red cherries, cornstarch, sugar, water, and a little almond extract if you want. (I like it, but if you don't by all means leave it out)

Open the cans of cherries and drain off the juice into a small saucepan, add 1 cup sugar (can use less if you want it less sweet) and bring to a boil.

In the meantime, make a slurry (that's just a fancy way of saying mix the two together until its smooth) of 3 tablespoons cornstarch and 3 oz. water.

While the juice is boiling grab a whisk in one hand and the slurry of cornstarch and water in the other and slowly pour the cornstarch slurry into the boiling juice whisking so that it doesn't get lumpy.

Turn down the heat a little and continue stirring until the juice is clear and thickened.

Take it off the heat and add a few drops of almond extract if you want it. I used about 1/8 teaspoon. Oh so yummy!

Add the cherries and set it aside until you are ready for it.

Crust:

This is so crazy easy. . .Find a medium sized mixing bowl and dump in 2 cups flour, 2 cups oatmeal, 2 sticks of softened butter, 1 teaspoon baking soda, 1 cup brown sugar, and 1/2 cup white sugar. I usually add a little salt (1/4 teaspoon) too, but the recipe doesn't call for it so I guess that's optional.

Mix it all up until crumbly with your fingers or a pastry blender.

I have tried to freeze the crumbs before so that it was ready to throw together fast, but it really is important for the butter to be softened or else the bottom crust gets all crumbly and falls apart. Still tastes good, but it sure isn't pretty. So if you decide to freeze the crumbs, you have to let them come to room temperature before using them.

Take half of the crumbs and pat firmly into a 9 x 13 inch pan to make the bottom crust.

Pour the cherry filling unto the bottom crust.

Sprinkle the remaining half of the crumbs on top.

Bake at 375° for 15-20 minutes until golden brown. Be careful not to over bake because the butter can burn.

We often have it for dessert with ice cream at supper and then the leftovers for breakfast the next morning. Hey it's oatmeal and fruit right??? Works for me☺


Cherry Crisp:


2 cans tart red cherries
1 cup sugar
3 Tablespoons cornstarch
3 ounces water
1/8 teaspoon almond extract, optional

Drain cherry juice into a small saucepan. Add sugar and bring to a boil. In a separate small bowl mix the cornstarch and water until smooth. When the juice comes to a boil, pour the cornstarch mixture into the juice stirring until smooth, thickened, and clear. Take off heat and stir in almond extract, if desired. Add cherries and set aside until needed.

2 cups oatmeal
2 cups flour
1 cup brown sugar
1/2 cup white sugar
1 cup butter (2 sticks), softened
1 teaspoon baking soda
1/4 teaspoon salt (optional)

Mix together until crumbly. Place half of the crumbs into the bottom of a 9 x 13 inch pan and press down to form the bottom crust. Pour the cherry filling over the bottom crust and then sprinkle the remaining crumbs on top.

Bake at 375° for 15-20 minutes until golden brown. Do not over bake.

Friday, April 30, 2010

Don't mess with tradition

I love May Day. I know it doesn't get celebrated a whole lot any more, but it is actually was one of my favorite holidays as a child. While growing up, my siblings and I would run across the field to Grandma's house on May Day to bring her a bouquet of lilacs in a homemade basket of sorts. We would ring the doorbell, leave the basket, and then run as fast as we could to hide. Of course we actually wanted her to find us so she would invite us in for a snack. (which is of course the best reason for going to Grandma's house) So much fun!

And every year my Mom would make caramels for May Day. I really have no idea why. She would make them while we were at school and then a little cup made into a basket with a pipe cleaner handle filled with caramels would be at our place at the breakfast table. Now every May day I crave homemade vanilla (completely unhealthy) caramels. I can't be sneaky about making the caramels, because my children are at home with me, but that's okay. Once you've had a homemade caramel you will think you are in heaven.

This year I tried to alter the recipe. I prefer not to use corn syrup so I tried to sub 1 1/4 c. sugar and an additional 1/4 c. of milk for each cup of corn syrup. It didn't work at all. The caramels tasted okay, but they had a yucky, sugary texture that just is not right. So I made them again following the recipe. I shouldn't try to mess with a good thing-a lesson learned the hard way.

Making Caramels is a labor of love for sure. I actually don't know if anyone in their right mind would want to attempt them, (I'm clearly NOT in my right mind), but I thought I would share how I made them anyway. Caramels are not hard to make, but you need a ton of patience. Maybe even more than a ton.


Chop the nuts as fine as you like. We used walnuts, but any nut you like would be just fine.

Add the butter, sugar, corn syrup, and evaporated milk to the pot and get out your candy thermometer because it will be your best friend for the next hour or so. Cook over high heat to 210º. Lower your heat and stir.

The first part goes rather quickly and you may think "Ha! This is going along just swimmingly", but be warned that it plateaus around 215º and won't budge for a long, long time. I think it took me about 45 minutes. I called my sister while I was stuck by the stove stirring and that helped the time go by a little faster.

I know, I know, I'm a crazy woman for doing this, but its tradition! What else could I do??? Plus, they are just amazingly good.

Make sure the pot you use is fairly big because as it boils it will want to boil over. Eventually it will condense down and thicken up, but right at the beginning it will want to boil over. Just continue to stir and turn down the heat.

Approximately an hour to an hour and twenty minutes after you started the caramels finally reach 244º. Turn off the heat and then add vanilla and your chopped nuts stirring quickly until it is all mixed in. The alcohol in the vanilla will cause some rapid bubbling as it burns off, but don't worry as long as your burner is turned off you'll be fine. (You did turn it off right???? Very important unless you want to have a flambe')

Pour the caramel mixture into a prepared 9 x 13 inch pan lined with parchment that sticks up over the edges. When it is cool you will be able to lift it easily out using the parchment onto a cutting board.

Cut up the caramels and wrap in waxed paper or plastic wrap.

Vanilla Caramels
2 c. sugar
2 sticks butter
1 3/4 c. corn syrup
1 (14 1/2 oz.) can of evaporated milk
1 1/2 T. of vanilla
1 c. chopped nuts

Combine first four ingredients; cook over high heat until 210º. Reduce heat and stir constantly to 244º(this takes a long, long time-hang in there). Remove from heat; add vanilla and nuts then stir vigorously. Pour into a parchment lined 9 x 13" pan and let cool. Turn out onto a cutting board and cut into small pieces. Wrap in waxed paper. Makes approx. 2 pounds.


If you need May Day basket ideas, Skip to my Lou has a lot of cute ones.

Oh, and I also wanted to tell you that I'm planning a give-away the beginning of next week so make sure you stop by again then.

Happy May Day and have a wonderful weekend.
Saturday, April 24, 2010

There are times. . .

when I completely ignore all the things I should do

and just bake cookies instead. My family doesn't seem to mind too much. (unless they can't find any clean underwear☺)

recipe can be found HERE

Substitutions I made to the recipe: I used softened butter instead of canola oil and the conversion on the back of the cocoa can for the squares of unsweetened chocolate (3 Tablespoons cocoa powder + 1 Tablespoon oil=1 oz. square of unsweetened chocolate).
I substituted only to use what I had on hand. I'm sure the recipe is great as written.

Delish and a whole lot more fun than washing dishes. Enjoy your weekend!

Monday, March 8, 2010

Baked Alaska

My husband requested Baked Alaska for his birthday dessert last Friday, if "it wasn't too much work."

Now don't tell my husband, because I want him to continue to be impressed with me, but I almost laughed because actually it was one of the easier things to make and actually doesn't take too much time to do especially since most of it can be done ahead of time.


There are many ways to make Baked Alaska. You can choose any cake or flavor of ice cream you want. I made ours with Angel Food cake because that is what my husband likes the best. You can just buy the angel food cake from the grocery store bakery if you want. I used a cake mix. Homemade would be wonderful, but it would take more time that way. Do whatever works best for you. Your family or guests won't know or care I promise.

Cut about 1 inch off the top of your angel food cake all the way around. A serrated knife works best on angel food. Save the top to put back on after you have filled the inside with ice cream.


Now this is the best part. . . Pull out the center of the cake making a tunnel to put the ice cream. Leave about 1 inch of cake in the center and outer edges.

Quickly eat all of the yummy cake that you just pulled out before the kids catch you. (But don't eat the top of the cake that you cut off-you still need that part) I shared my treasure with my husband because it was his birthday, but if it had been any other day I probably would have eaten it quick and put an innocent look on my face before anyone else caught me.


Your cake should look something like the above picture. Don't forget to wipe the cake crumbs from your chin and pull out the ice cream from the freezer.


Allow the ice cream to soften so that you can gently fill the tunnel you made with as much yummy goodness as you can. My husband picked out strawberry swirl, but any ice cream you like will do fine.

Put the top of the cake back on over the ice cream and pop the whole thing into the freezer to get the ice cream good and hard.

You can do all of the above ahead of time.


Next you make a meringue:

Beat the egg whites, cream of tartar, and vanilla until soft peaks form. Slowly add your sugar and continue beating until stiff peaks form and all the sugar is dissolved. Stiff peaks should look like the above picture. If you are brave you could even tip the bowl over upside down and the meringue wouldn't fall out. I'm not necessarily recommending that though so don't yell at me if you end up with meringue on your head.


Right before serving, frost the cake with all of the yummy meringue. Cover the cake completely as this acts as insulation to keep the ice cream cold while the Alaska is in the oven.


Bake the Alaska at 500°F for a few minutes until the meringue is a lovely golden brown color. It won't take very long so keep your eye on it.

The one in the picture above still needs to bake a wee bit longer so that sides turn a golden brown as well.


Slice and eat right away.

We managed to eat the whole thing in one sitting.☺

Baked Alaska

1 Baked Angel Food cake
1 quart of ice cream any flavor, softened (you probably won't use all of the ice cream)
Meringue:
  • 5 egg whites
  • 1 tsp. vanilla
  • ½ tsp. cream of tartar
  • ⅔ c. sugar

Cut 1 inch off the top of the angel food cake all the way around. Set the top aside to use later.

Pull out the inside cake to make a tunnel leaving 1 inch of cake all the way around.

Fill the tunnel with softened ice cream.

Put the top back on the cake and pop into the freezer until the ice cream is firm again.

At serving time, beat together egg whites, vanilla, and cream of tartar to soft peaks. Gradually add in sugar beating after each tablespoon is added until stiff peaks form.

Place cake on a baking sheet covered with foil or parchment paper. Spread with egg white mixture, sealing to edges of cake and baking sheet all around. Swirl the meringue to make pretty peaks.

Bake in a 500°F oven about 3 minutes or until golden brown.

LinkWithin

Related Posts with Thumbnails