I had a lot of scraps left over from a birthday banner that I made my niece for her birthday. (I will have to blog about that soon) I guess I have birthday on the brain because of all the birthdays our family has been celebrating lately, so I decided to make a scrappy place mat to be used by the special birthday child. This is a project that can be easily adapted to what you have on hand so use your imagination and stash to come up with your own.
MATERIALS:
-12- 1/2" x 16- 1/2" batting
-scrap strips
-double fold wide bias tape
-thread
-12-1/2" x 16-1/2" fabric for the back of the place mat
-Steam a Seam 2 or something similar if you are going to applique
-trim such as rickrack is optional
-Cupcake applique pdf, optional (click to download)
INSTRUCTIONS:
1. Dump out all the scraps you have that you might want to use. I used scraps that coordinate, but I think it would be fun using whatever you've got even if it doesn't match.

2. Placemats seem to be about 12"x16" so cut out some cotton batting is about 12- 1/2" x 16 -1/2" to allow for sewing on bias binding around the placemat. I used an old table protector that I found on a garage sale. (Hmmm. . .you know. . . an old ugly towel would probably work too. Use what you've got. You're trying to use up stuff, not buy more.)
3. Lay out your scraps until you come up with a pattern you like. Some of mine weren't quite long enough so I pieced them into strips. Whatever width you want-no measuring necessary!!!!
4. After you have figured out the order you want your strips to go in and have pieced the ones that weren't long enough together, put the first strip on the batting right side up next to the left edge as shown in the next picture.
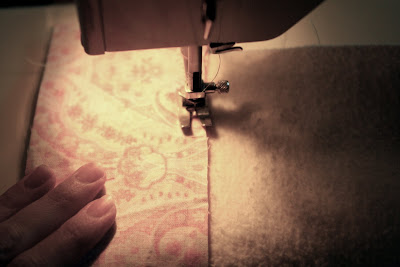
5. Lay the next strip on top of the first strip right sides together so that the wrong side of the second strip is facing up. Now you should have three layers: Batting, first strip facing up, second strip facing down on top of the first strip. Are you still with me???? Good.
6. Stitch along the right side of the strips. Stitch anywhere you like, just make sure you catch all the layers. If you don't catch them all stitch again a little farther into the strip. It won't matter in the least what your stitching looks like because it will be all covered up. I purposely made mine a little wonky so its different widths and not perfectly straight. It was so much fun to do!!! This is my kind of sewing ☺
7. Open up the top strip and iron it flat. Start getting excited because you can see that its going to look A M A Z I N G !
8. Lay your third strip face down on top of the second strip that you just ironed flat. Stitch again along the right side of those strips. Anywhere. Make it as wonky as you like. Open the third strip up and iron flat. Repeat the process until you get your place mat batting completely covered.
9. Trim off all the strips so that they match the edge of your batting. My batting wasn't quite square after all the sewing so I gave it a tug and it squared back up.
10. If you don't want to make yours a birthday place mat, you could just cut out fabric for the back and bind it with bias tape.
11. I made a cupcake applique with yellow jumbo rickrack along the middle and small green rickrack for the candle. To make the flame, I used the yellow jumbo rickrack and cut it slanted from one hump to the next hump so that it looks like a flame. I stitched all rickrack in place using a straight stitch. I used Steam A Seam 2 to keep my cupcake applique in place. Pretty nifty stuff. I did a tight zigzag around the whole cupcake to keep it in place and so it wouldn't fray. If you like a frayed edge, you could just do a close-to-the-edge straight stitch.
12. Cut out your back fabric. Make a sandwich with your back fabric facing down, then your cotton batting stitched with your strips facing up. Baste all layers together so that when you apply the bias tape it doesn't shift on you.
13. Sew double-fold bias tape around the whole placemat. I tried to miter the corners. . .but. . . well. . .it didn't go so well for me. If you have any tips please let me know. If you want it to go easier for you, you could round the corners of the placemat and not worry about mitering. It might save you a huge headache.☺ Tylenol works too.

14. Step back and admire your placemat. Wasn't it fun??? Let me know if you have any questions or if I didn't explain something very clearly.
Sew Mama Sew is sponsoring a Scrap Buster month during October. You can read all about it by hitting the Scrap Buster button on the right sidebar of my blog if you are interested in participating.
Edited to Add: the contest is all done!!!!
Feel free to use this tutorial for personal use or to make them to sell, but please mention my blog as the source for the pattern. Thanks.☺


Too Cute! Great idea to use an old towel for batting! I'll have to try that one of these days.
ReplyDeleteLeat
You are so incredibly creative! I love that idea! I was just thinking I should make some fall placemats but I didn't really know how to go about doing it or what I should do. That is a perfect idea. You know, minus the birthday cupcake! You'll have to make one for the boys too!
ReplyDeleteGreat idea! Thanks for making a tutorial!
ReplyDeleteJody,
ReplyDeleteI cut an old towel into 6 rectangles and started making placemats last evening. That idea worked great! Now to figure out how to set my serger for a rolled hem...
S.R.
Yea!!!! I'm glad that idea worked!
ReplyDelete